Table of Content
This means that the outer part of the nail extension then has to be filed down and basically sculpted to achieve a smooth, nail-like look. The benefit is that the gel extensions adhere better to the nails and are less likely to lift or fall off. We’ll explain how to do both methods in our step-by-step guide. Cure With all of the nails on one hand covered in base coat, place your hand into the LED lamp, and allow that layer to cure for seconds, depending on your lamp. Base Coat Next, apply a very thin layer of your base coat to each nail.
“Your natural nails grow out regardless of how long your acrylics last, and you’ll start to see growth at your cuticle beds after two weeks,” she explains. Here), and it is a relatively simple design to execute. Make sure you use a high-quality nail polish that’s been specifically designed for french manicures. You should also try to keep your nails dry as much as possible and avoid putting them in water or exposing them to other harsh chemicals.
Buying Acrylic Nail Supplies
I tend to lean towards acrylic or dip nails when choosing a nail set because they last forever and I love the strength that they give me! They are so durable and you can do basically any shape or nail color of your choice with them, so the possibilities are endless. In order to make acrylic nails more appealing and longer lasting, the last step is to put them on.

“This minimizes the amount of time the gel is exposed to air — long exposure will negatively affect the result,” says Kao. She recommends using a paint and cure process (i.e. curing one nail at a time rather than your whole hand) for the best results. Next up, you’ll want to buff your entire nail from edge to edge.
Step 4: Paint a base coat on your nails
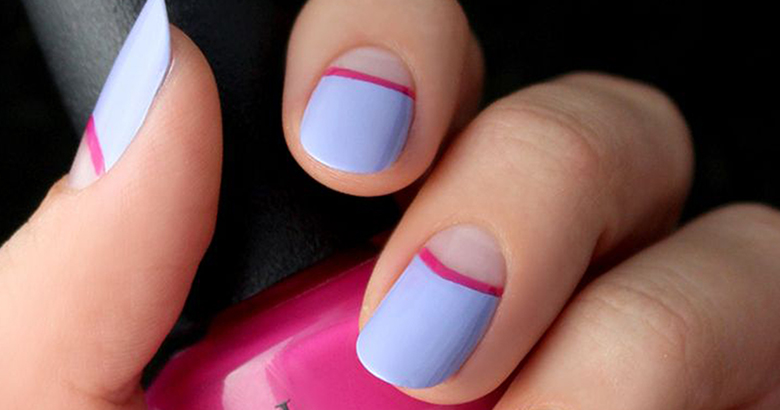
A design like this will suit all nail lengths and shapes. Try this look or use the red to create the polka dot nail art. The French tip is as classic as it gets when it comes to nail art, but the PaintLab French Tip Press-On Gel Nail Set reinvents the look with cool-toned mint tips. These false nails are made with gel polish, which gives them a glossy, chip-free finish that'll last for up to two weeks.

As mentioned above, Aaron stresses the importance of not peeling off the polish, as this will peel away layers of the nail plate and end up damaging the nail. Start by filling the top of the nail until you see a white, chalky color, she says; this indicates you’ve filed through the topcoat. Then soak your nails in pure acetone for seven to 10 minutes, finishing by scraping off any polish with a cuticle pusher. She says that you should keep in mind that you may need to re-soak several times. You'll also get extension gel and foil for shaping your nails. Once our tester got the desired shape and length, the drying process was a breeze.
Nail Art Stickers
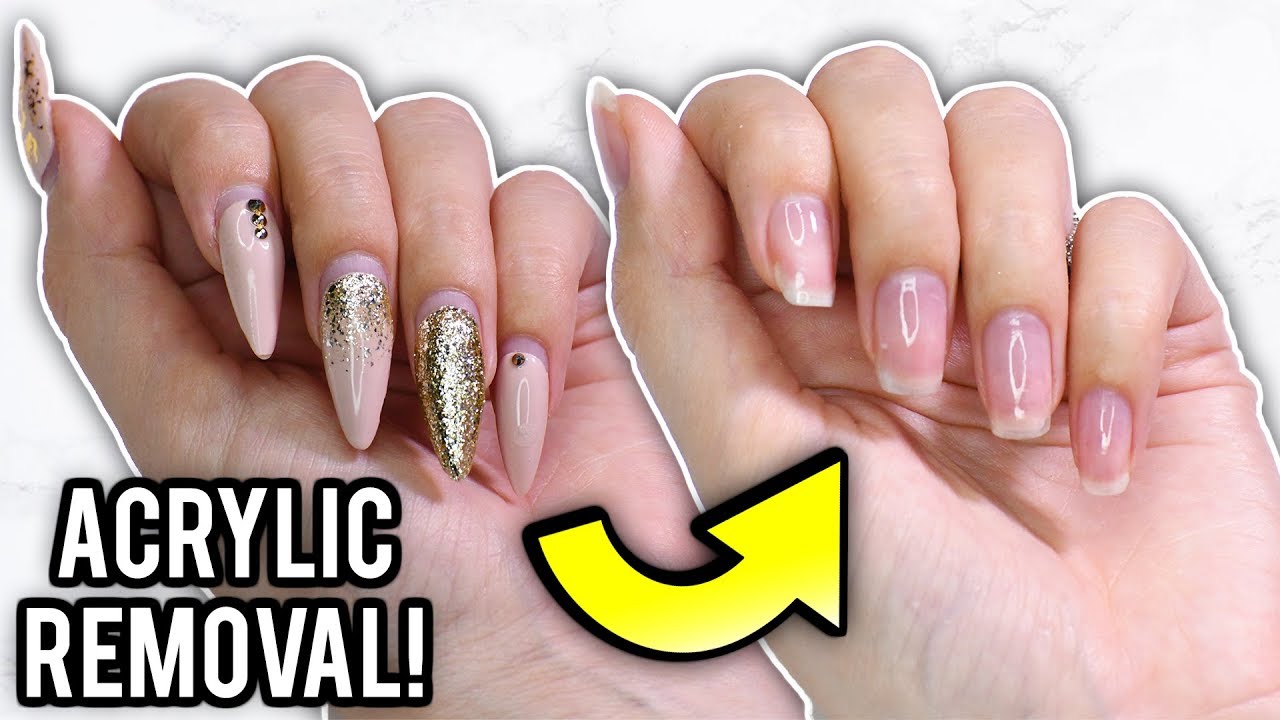
Acrylic nails are nail extensions and enhancements created by mixing powder and liquid monomer together to form a paste that is shaped onto your nails. They add length and strength to nails, and create a larger canvas for those who may be lacking naturally. You can also get your desired perfect shape and can change it each time you visit your nail tech. Giving yourself an at-home manicure is no walk in the park, so removing acrylic nails without your trusty nail tech is an even bigger feat. If you’re an acrylic devotee, then you’ll know that the process of removing acrylics can be confusing and time-consuming—especially if you aren't sure how. The next step is to start painting the tip of the nail.
"I have received so many compliments on my nails shape and color. People gasp when I reveal that they are just press-ons." In one 15-minute application, you get that fresh-from-the-nail-salon look with press-ons that have wonAllure Best of Beauty. This Static Nails Reusable Pop-On Manicure's design is a nod to a French manicure, but features an asymmetrical flick of white on the tip of each nail. Add some nail polish thinner to old nail polish that's too thick.
The user should feel "Bad and Boujee" whenever wearing her creations, according to La'Joy. With every press-on kit you buy, you get 10 nails, glue, a file, and a cuticle pusher. Doing your nails at home can be both cost- and time-effective if done properly.
So, if you want to elevate your entire experience, grab Olive & June's The Press-On System for everything you need in one carry-on pouch. This kit comes with one 42-count set of nails from Olive & June's collection for $54, but you can also upgrade to four sets for $80 to have more variety. It also comes with all the tools for application and removal, like a nail clipper, file, buffer, cuticle pusher, nail strengthener, cuticle serum, and removal kit. Not only are these faux nails nearly identical to expensive gel manicures at the salon, but they also come in a plethora of shapes, sizes, and thicknesses to experiment with. Plus, it's worth mentioning that the glue quality has gotten better, too, which means today's fake nails last much longer than the press-on nails of yesteryear.
These designs are simple enough for you to be able to do at home but also easy enough for you to change and make your own, to create your perfect nail design. A key thing with nail art is the idea of being able to make it our own, finding a design you love and making it your own is what makes you enjoy your manicure more. The Salon Pro Gel Nail Polish Kit was the first I tested, and the first traditional gel manicure I’d ever had. As a beginner, I appreciated that each bottle was labeled one through three to specify which order to use them in. Directions on how to use the kit were also written on the box, as well as in an instructional pamphlet, so the margin of error was slim.

They have the file pattern etched into the glass or crystal, hence the longevity. As you can see in the picture below, these are my nails 2 weeks old after my last infill. They have grown quite a bit, I usually leave them until week three but I got some new nail goodies and wanted to try them out. The part just above my cuticle, which is a bit darker is my outgrown nail. Learning how to remove them safely will minimize any damage and help keep your nails healthy. Ahead, how to take off acrylics nails at home, according to the pros.
She used the purple-to-white ombré hue and loved the overall results. With some practice, she thinks they'll continue to look even better. Another issue might be that you had some acetone on your nails, which can disrupt the polish and prevent adhesion.


No comments:
Post a Comment